1stwebdesigner |
| Create Surreal Photo Manipulation with A Man Without Face Posted: 15 Mar 2010 02:59 PM PDT
In this tutorial we will learn how to create selection, adjusting color, and adding depth to image.
Source NeededFor this tutorial, we will need these images:
Step 1: Selecting The Victorian ManWe’ll start by cutting this man from his background. For this type of selection, I prefer to use the manual way, path. From paths panel create new path then using pen tool draw path around the man. As you can see i don’t care much about his face because we will remove it later.
Step 2Once we’re done creating path, hit ctrl+Enter to change it to a selection. Press ctrl+J to duplicate the selection to a new layer. You can also do this by selecting menu Layer > New > Layer via Copy. To help focus on the man, hide Background by clicking its eye icon.
Step 3: Removing FaceTo remove his face we can just use an eraser.
Step 4: Fixing Floating HatNow, we need to create his bottom hat. To do this we must draw manually using clone tool. Activate clone tool and check Sample All Layers. This option allow us to clone on a separate layer and keep the original picture safe. Then create a new layer. With clone tool sample a similar color from his hat by alt+click it.
Step 5With clone tool, draw his bottom hat. This might take a while, I spend 10-15 minutes for this. To keep it natural I suggest you to use different clone source every time you click.
Step 6Using lasso tool, create ellipse selection underneath his hat and fill it with black.
Step 7Add Gaussian Blur (Filter > Blur > Gaussian Blur) to give it a soft realistic shadow.
Step 8: Fixing CollarWe need to manually draw his back collar. The step is a bit similar to what we do when creating bottom part of his hat. Create a selection in collar shape, sample color from his front collar, then draw it directly with brush tool. To avoid flat color we must use many color source from his front collar.
Step 9Draw shadow inside his collar and add another Gaussian Blur.
Step 10: Import Man Without Face To New Background.Now we’re done with this man. Select all (ctrl+A), click Edit > Copy Merged (ctrl+shift+C). In our new background paste the man (ctrl+V) and resize it (ctrl+T). See image below for reference.
Step 11: Dodge and BurnWe still need to fix lighting on the man. To do this, we will use non-destructive burning and dodging. First, alt+click New Layer icon. In the dialog box select Use Previous, Mode: Overlay, and Fill with Overlay.
Step 12See picture below! The light source is behind the man so his back must be lighter than his front. To fix this, paint with burn tool to make it darker and dodge tool to make it lighter.
Here’s what we see if the layer is in Normal blend mode.
Step 13: Add ShadowOff course this man must have shadow. We know that the light source is behind him, so the shadow must be in front of him. Duplicate the man layer and hit ctrl+T. Hold ctrl and move its corner until it lies on the ground.
Step 14We don’t want to see his twin lying on the ground right? We want his shadow. So, here’s the trick. Hit D, this will change foreground color to black. Then hit shift+alt+delete, this will fill layer with foreground color (in our case, black).
Step 15We still need to focus on the detail. As you can see below, cane’s shadow moves a little and there’s a hole between his feet. I fix this by doing minor transformation and painting with black.
Step 16Add Gaussian blur to create a soft realistic shadow.
Step 17Farthest shadow need to be more blurry. So, select those part, soften the selection with Feather (Select > Modify > Feather), and another Gaussian Blur. Here’s a tip: because we’ve just perform a Gaussian Blur we can just hit ctrl+F to repeat it again. If you want to use different radius use ctrl+alt+F.
Step 18Add layer mask and add black to white linear gradient to make the shadow fades away.
Step 19: Add Water TowerSelecting the water tower with path is not a good idea. You’ll get frustrated doing it. The easiest and smartest way is using color information in channel. Our image is in RGB, that’s Red, Green, and Blue. The water tower stands in front of a clear blue sky. So, the sky will be very visible in Blue channel. Now, I want you to duplicate Blue Channel by dragging it to the new channel icon.
Step 20Add Levels (ctrl+L) with this setting.
You can see that the sky has magically disappear. Try that with pen tool!
Step 21Some part of the water tower is turning white. We can fix it easily by painting it with black.
Step 22Here’s the basic principle of masking: “White reveals, Black conceals.” We want to select the water tower, not the sky. So, the sky has to be black and the water tower has to be white. Wait! Our image is completely wrong. That’s easy, just hit ctrl+I to invert it. Step 23Ctrl+click blue copy channel to convert it to a selection. Copy the image and paste it behind our faceless man.
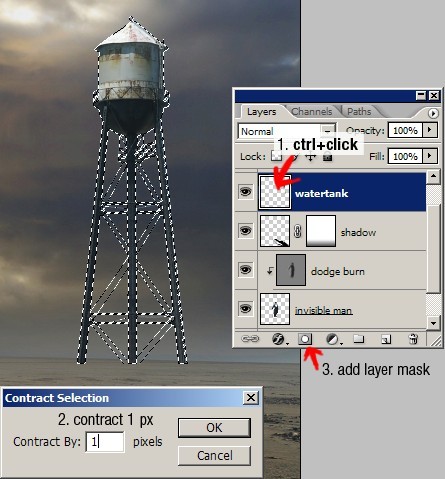
Step 24You might notice that the there’s a small part of the sky in the water tower. Here’s one easy way to fix it. Ctrl+click water tank layer. Contract selection by 1 px (Select > Modify > Contract). Click add layer mask icon.
Here’s the result.
Step 25Fix the lighting with non-destructive dodging and burning. We have done this in step 11.
Step 26: Adding Depth of FieldIt’s time add depth to this image. Cut one of the hat collection from old top hat set. Paste it and place it near the edge of the canvas. Hit ctrl+T and rotate it to give a more dynamic movement.
Step 27Give it a Gaussian Blur. Because this hat is near us, we’ll give it a big radius.
Step 28Add another hat and give each different radius depends on its position.
Step 29: Add shadowDont forget to give shadow to the water tower. The step here is similar to what we did when creating the man’s shadow. Duplicate water tower layer, fill it with black, transformation, add Gaussian blur, and fading it with gradient mask layer.
Step 30Again, don’t forget to add shadow for those hats.
Step 31: Final AdjustmentI want to add more blue to the sky. For this, I add adjustment layer Channel Mixer on top of all layers with these settings.
Step 32Paint everything with black except the bright sky in top right. Now, only that part is affected by the Channel Mixer.
Step 33To add more contrast add adjustment layer Levels with this setting.
Step 34Paint everything with black except the faceless man.
Step 35Finally, I want to make this picture warmer. Add an adjustment Layer Photo Filter with Warming Filter (85), Density 25%.
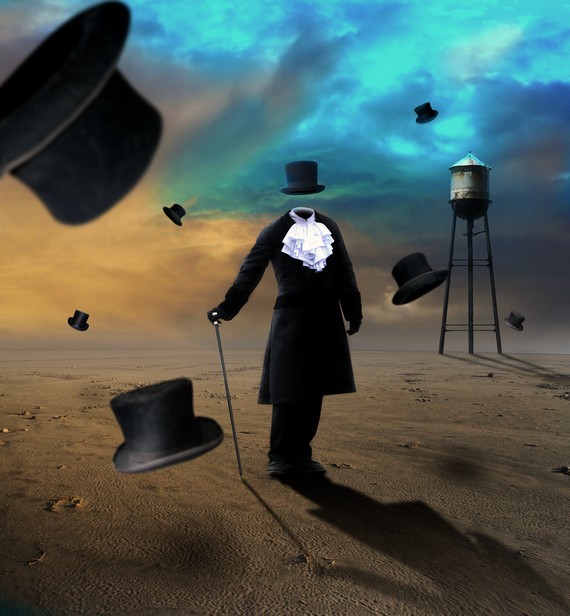
ConclusionsAnd here’s what we have now. I hope you like the final effect. If you have better tips about the technique used here I’d love to hear it.
Download FREE PSD File!!!To help you learn this tutorial you can download the psd file here. |
| Tumblr: An Introduction Guide For Microblogging – Part 1 Posted: 15 Mar 2010 03:00 AM PDT
What is tumblr?Put simply, Tumblr is a service that does exactly what Wordpress does for blogging, but for microblogging, or tumbleblog’s instead. To fully understand what Tumblr does, you first need to understand what these so-called tumbleblog’s actually are.
What does this mean? Well basically, Tumblr fills the gap between Twitter, where people tweet resources, images, and thoughts, and traditional blogging platforms, like Wordpress where each post is a proper article. Instead, Tumblr works with seven types of post; text, photo, quote, link, chat, audio and video, and it handles them all very well.
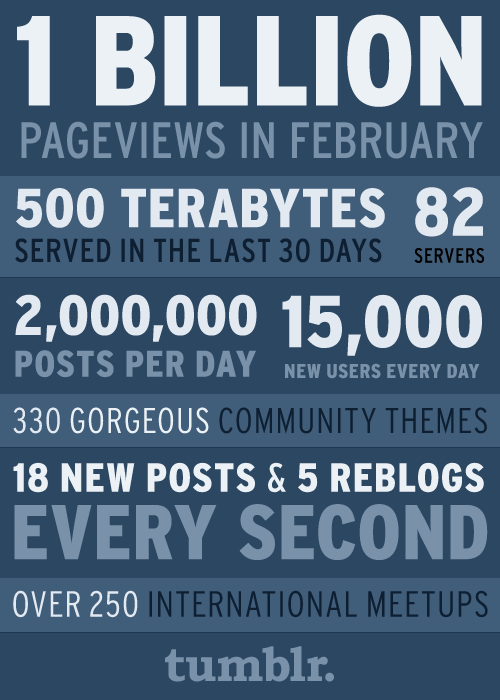
Why is Tumblr becoming increasingly popular?According to Tumblr statistic’s, in the last six months, Tumblr has grown from around 300M monthly page views, to over 1 Billion in February 2010; a massive growth for any product, and it speaks for itself really. A product doesn’t grow at such a rapid rate, if people aren’t enjoying using it.
Easy to updateThe biggest reason behind Tumblr’s growing support, is it’s vast number of social features, and it’s ease of use. For a start, Tumblr make it extremely offer for you to post to your blog, even if you can’t access your homepage yourself. Here are some of the clever ways Tumblr makes it possible for you to update your tumbleblog:
3rd Party ApplicationsAs well as the fantastic free iPhone app that is available officially from Tumblr, you also have access to a multitude of applications for the iPhone, Web, Desktop’s, Mobile’s, Widget’s and Browser’s. They are all filed away tidily in an official Tumblr app directory. Social Network IntegrationDefinitely high up on the list of reasons for Tumblr’s acceptance has been its solid two-way integration with other social media, and networking services. Part of its automatic posting from other sites come from major names such as Digg, Youtube, Facebook and Twitter, but it doesn’t stop there. As well as having the ability to automatically pull in your content live from these sites, you can also send information back. Facebook is a prime example with its ability to show your activity on Tumblr on your Facebook wall, keeping all your friends up to date with what your blogging and activity. Other notable featuresOther than those already mentioned, Tumblr also focus’ on those important, but small things that you need.
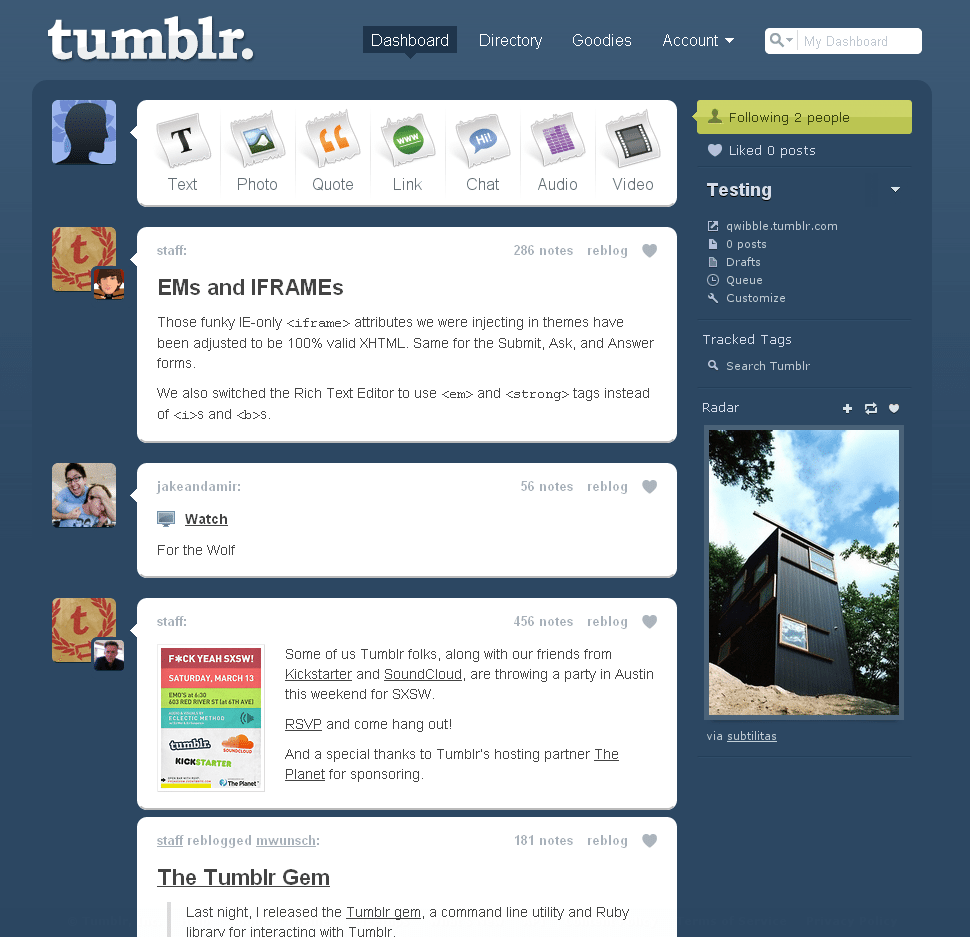
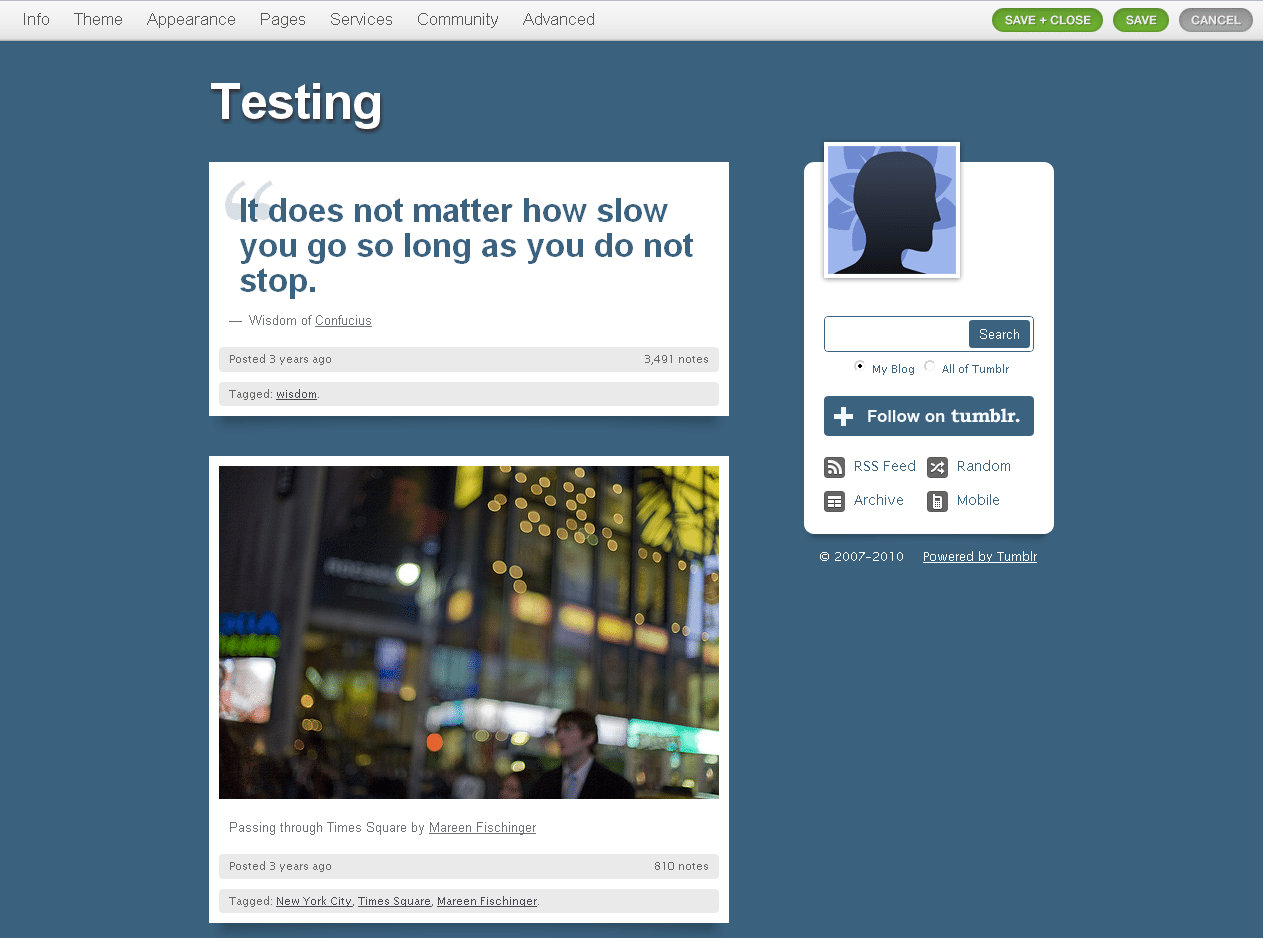
What is the backend of Tumblr like?First off, Tumblr wouldn’t be where it was if it wasn’t for its easy to use backend user interface. The interface is split into two sections; the dashboard, where your’s and other peoples content meet you, and customisation, where you control all sorts of aspects of your tumbleblog. DashboardPosting any of the seven different type’s of content from your dashboard is a breeze, with visual buttons, and a clean design. The backend goes on to keep you up-to-date with all the Tumbleblogs you are following, in a very Twitter like manner, keeping it clean and easy to read. For a look at how the dashboard looks, click on the image below. CustomisationCustomisation though, is a whole different kettle of fish. It is basically a dummy page of your current theme, with one default entry in each of the seven post categories. A menu bar at the top of the page allows you to make many important, and useful changes and decisions that affect your tumbleblog. The menu provides a multitude of options;
As you change these options, especially your theme options, the dummy page below changes to mirror the choices you have made, allowing you to check how your blog will look, as you work. ConclusionTumblr is a fantastic piece of kit, filling in that gap in the market between products such as wordpress that provide full blogs, social networking such as facebook, and status updating from Twitter, and it does it extremely well. Tumblr is honestly a pleasure to work with. Simplicity makes the user interface effect and easy to use, and you never feel like there isn’t anything important missing, or out of your control. It makes blogging and sharing things you find on the internet a breeze, and most importantly, unlike Twitter, it does so visually. If you find yourself failing to keep a full blog up-to-date, and enjoy sharing the things you find, the there’s no easier way to do so than Tumblr, so give it a go. Keep an eye here at 1stwebdesigner for more on Tumblr!
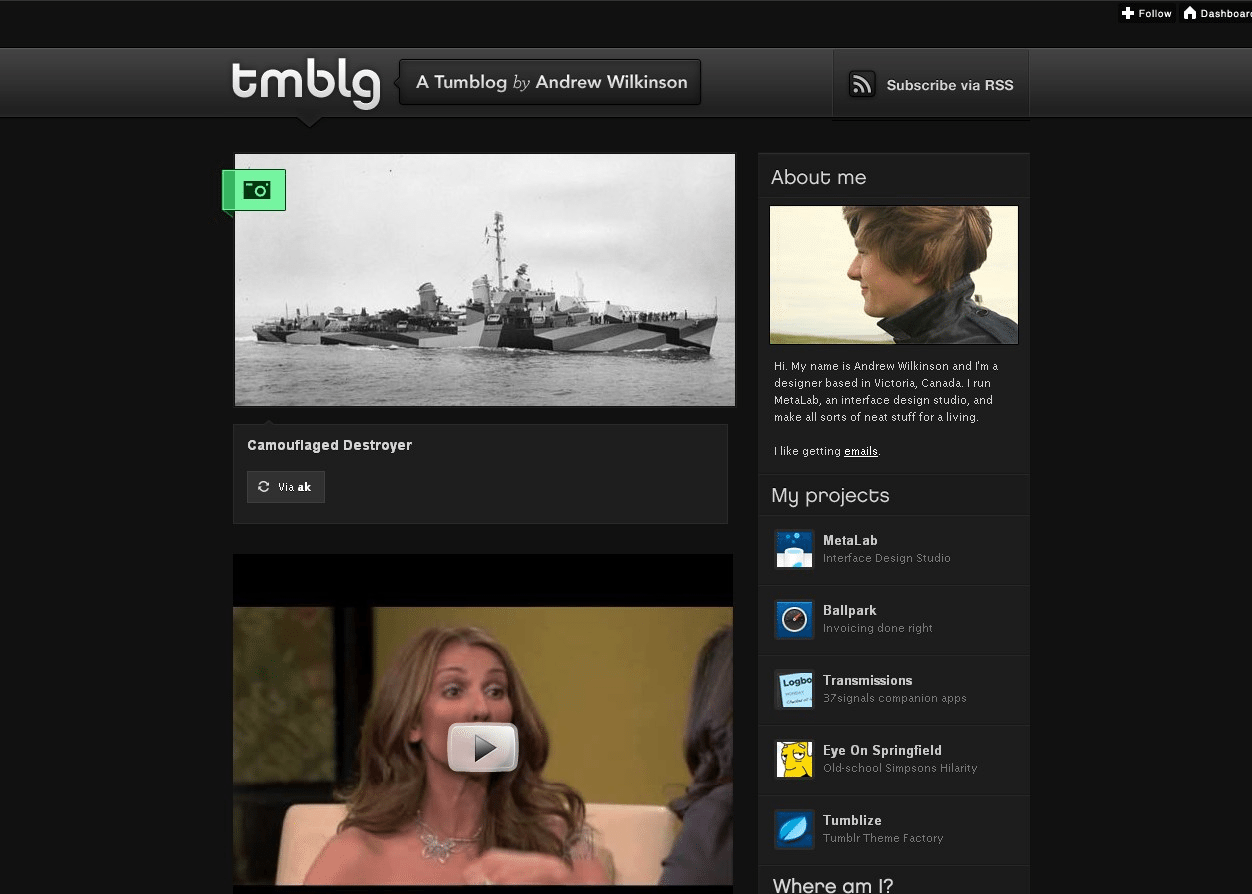
For those that do choose to start using Tumblr, or already do, then keep an eye here, because coming up are several articles that will increase your happiness with Tumblr, such as a roundup of fantastic themes, and more importantly learning how to create your own custom theme! For now, check out these 5 impressive tumbleblogs for inspiration to see what Tumblr is truly capable of. MetalabIt’s the interwebsMark JardineTmblgName that filmHope you enjoyed this post – keep coming back for more! |
| You are subscribed to email updates from Graphic and Web Design Blog -Resources And Tutorials To stop receiving these emails, you may unsubscribe now. | Email delivery powered by Google |
| Google Inc., 20 West Kinzie, Chicago IL USA 60610 | |










Comments (0)
Post a Comment