

1stwebdesigner |

| Customize Your Facebook Fan Page: Tips, Tricks, Applications Posted: 28 Jun 2010 02:00 PM PDT
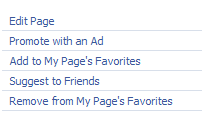
Static FBMLAn application which should be implemented by most of the fan-page owners. Static FBML is really simple to implement and can be used to do various modifications on Facebook Fan Page. FBML supports pure HTML & CSS. We will use Static FBML to create customized Fan page for Facebook. Adding FBML To Fan Page
Now we will add some code that will transform your fan page completely. Creating Landing/Welcome PageLanding or Welcome Page is the first page you see when you visit a new fan page encouraging user to click on the Like button. Creating a Landing page really simple & I will share the step by step guide on how you can do it easily. In previous step you have already installed the Static FBML application now you need to create a welcome page image that will encourage users to click on the like button. You can do it easily in Photoshop or any similar applications. When creating the image “Do remember that image’s width should be of 520px” the height does not matter but it would be good if you keep it of appropriate length. 1.Create an image with width 520px & appropriate height in Photoshop or similar application.
5.Now you will see a similar window like the image below. 6.Now add an appropriate title like Welcome or your blog name anything you prefer. In FBML part just add the following code. <img src =”http://yourwebsite.com/FB/imagename.jpg”> If you want to add link to the image just add the following code <a href=”http://yourwebsite.com”>
</a> You can also use text after the image with some HTML tags like h1, h2, , etc as done in 1st Web designer Facebook fan page. 7.Once you are done click on save changes & now navigate to your Fan Page you will see a new tab with the title you have written, by clicking on that tab you will see your image in that page.
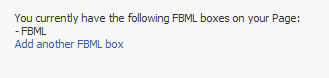
You are all done with creating a new & improved version of your fan page. We will add some more code to fan page to make it more personalized so keep reading further. Adding Subscriber Form to Fan PageIf you use feedburner to manage your feeds you can easily add subscriber form to your fan page by getting the code under the Subscription management in your feedburner account. Now navigate to your FBML application and then click on edit & then click on add another FBML box.
After adding the FBML box, enter title subscribe & paste the code from the feedburner into that box & now you are all done. If you want that box to be appearing in the sidebar or the wall just click on the tab & select move to wall tab & then it will be appearing on your fan page’s wall. Similarly you can add contact form to the fan page as well. Other Useful Articles About FBML How to Add Google Analytics to Your Facebook Fan Page 7 FBML examples to rock your Facebook fan page How to Put a Contact Form in a Facebook Fan Page Applications for Customizing FaceBook Fan PageIf you are not comfortable using FBML, then still you can customize your fan page using various applications. This application makes easier to share photos, Videos, Files, Twitter updates & lots of other stuff depending on your needs. There are large number of applications that will help you with your fan page. Below are some of the effective applications that will help you get your work done easily. Clobby – Group ChatThis is really useful application if you want to integrate live chat room to your fan-page. It is free application & allows users to create chat rooms & invite other friends to chat. It is great way to encourage users of the page to communicate with each other & increase the level of interactivity of the page. ShopTabIf you sell products online then ShopTab is perfect application for you to showcase & sell you products through fan-page. ShopTab is premium application so you need to pay monthly charges. InvolverInvolver provides professional application for your Facbook Fanpage which you can install with a single click. The involver has large application gallery which has RSS Feed, Twitter, YouTube Channel, Photo Gallery & many more applications. With the free account you can install only two applications. TigerlilyTigerlily application is easy to implement & its has content management systems of its own which is easily controlled from fan-page. In Tigerlily CMS free version you can easily add different modules like text editor, video, image, twitter, RSS Feed, MP3 player, flickr & podcast. Poll DaddyWith Poll Daddy application you can create polls which you can share it on your fan page to get feedbacks from the users & increase their participation on the fan page. Hope you found the post useful & informative, If you have other useful applications or FBML tricks to share then feel free to mention them in comments.    |
| How to Create your own BuddyPress theme (Part-2) Posted: 28 Jun 2010 03:00 AM PDT
If you haven't read the previous parts yet I recommend you do so to gain an insight into how to best go about the required steps. Doing more with your child themeIf you want to make changes to any of your themes files, usually all you have to do is open up that file and edit. Couldn't be easier. But if you're using a child theme you don't have the theme templates there to edit, as you're using files belonging to another theme. So what do you do? It’s actually a very simple process. All that's required for editing a file is for you to copy the file i.e. "header.php" from the parent theme, into your child themes folder and then you can edit what you wish. An example of something that many people wish to change in their BuddyPress site is the credit links found in the footer , as many spammers merely search "proudly powered by WordPress and BuddyPress" in Google to find sites using BuddyPress as the quoted text is found in the footer of the default BuddyPress theme. To remedy this do the following: In footer.php you'll find the below code, remove or edit it as you wish is proudly powered by WordPress and buddypress.org”>BuddyPress
You could remove this code, although leaving a credit link in your footer is the least you can do to thank everyone who works so hard to make sure BuddyPress, and indeed WordPress are as great as they are now. Every template file you copy over to your child theme folder can be edited as normal, just remember if when you update BuddyPress you may need to edit the file to include any added functionality, although there should be no need to worry about the theme breaking. Remember to try to use your functions.php to add extra content, instead of copying over the file if you’re only adding a few small pieces of code, refer to the previous guide if you’re stuck! Making a normal WordPress theme BuddyPress compatibleMaking a child theme using the default BuddyPress theme as the parent theme is great and not too difficult when you know what you have to do, but if you already have a working WordPress theme you mightn't want to go through the whole process of making a child theme from scratch. I'll show you how to make your WordPress theme work with BuddyPress in this next section. For this tutorial I'm going to add BuddyPress support to the new default WordPress theme Twentyten (Requires WordPress 3 and up). Note: In the interests of future proofing my work, I'm choosing to make a child theme and not edit any of the Twentyten’s actual code. To make life easier we'll use a plugin by Andy, the developer of BuddyPress to do as much of this work as possible for us! I'll show you how to make your theme independent of the plugin later in the guide. Download the plugin BuddyPress Template Pack and install it. Go into "Appearance" then "BP Compatibility" you'll now be at the start of the setup menu for the BuddyPress Template Pack. By following the on-screen steps your theme should be working well with BuddyPress. As it says on the plugins page "Once you are finished, your existing WordPress theme will be able to manage and display all BuddyPress pages and content."
What the plugin does is copy the special BuddyPress folder and files into your theme. The BuddyBar will now be able to display throughout your site. All the special sections that BuddyPress adds to your site will also work, although no navigation will be visible to these places except any links found in the BuddyBar. This is because BP Template Pack doesn't edit any of your theme files. Which is great if you change your mind about BuddyPress, but if you want to use it you'll need to edit these files yourself. If you're reading this and are using WordPress 3, then you could create the links using the new menu feature. Alternatively you'll need to add the following code for the navigation links. <ul id="nav"> php if ( bp_is_front_page() ) : ?> class="selected"<!--?php endif; ?-->> <a href="<?<span class=">php echo site_url() ?>" title="<!--?php _e( 'Home', 'buddypress' ) ?-->"><!--?php _e( 'Home', 'buddypress' ) ?--></a> </li> <!--?<span class="hiddenSpellError" pre=""-->php if ( 'activity' != bp_dtheme_page_on_front() && bp_is_active( 'activity' ) ) : ?> php if ( bp_is_page( BP_ACTIVITY_SLUG ) ) : ?> class="selected"<!--?php endif; ?-->> <a href="<?<span class=">php echo site_url() ?>/<!--?php echo BP_ACTIVITY_SLUG ?-->/" title="<!--?php _e( 'Activity', 'buddypress' ) ?-->"><!--?php _e( 'Activity', 'buddypress' ) ?--></a> </li> <!--?<span class="hiddenSpellError" pre=""-->php endif; ?> php if ( bp_is_page( BP_MEMBERS_SLUG ) || bp_is_member() ) : ?> class="selected"<!--?php endif; ?-->> <a href="<?<span class=">php echo site_url() ?>/<!--?php echo BP_MEMBERS_SLUG ?-->/" title="<!--?php _e( 'Members', 'buddypress' ) ?-->"><!--?php _e( 'Members', 'buddypress' ) ?--></a> </li> <!--?<span class="hiddenSpellError" pre=""-->php if ( bp_is_active( 'groups' ) ) : ?> php if ( bp_is_page( BP_GROUPS_SLUG ) || bp_is_group() ) : ?> class="selected"<!--?php endif; ?-->> <a href="<?<span class=">php echo site_url() ?>/<!--?php echo BP_GROUPS_SLUG ?-->/" title="<!--?php _e( 'Groups', 'buddypress' ) ?-->"><!--?php _e( 'Groups', 'buddypress' ) ?--></a> </li> <!--?<span class="hiddenSpellError" pre=""-->php if ( bp_is_active( 'forums' ) && ( function_exists( 'bp_forums_is_installed_correctly' ) && !(int) bp_get_option( 'bp-disable-forum-directory' ) ) && bp_forums_is_installed_correctly() ) : ?> php if ( bp_is_page( BP_FORUMS_SLUG ) ) : ?> class="selected"<!--?php endif; ?-->> <a href="<?<span class=">php echo site_url() ?>/<!--?php echo BP_FORUMS_SLUG ?-->/" title="<!--?php _e( 'Forums', 'buddypress' ) ?-->"><!--?php _e( 'Forums', 'buddypress' ) ?--></a> </li> <!--?<span class="hiddenSpellError" pre=""-->php endif; ?> <!--?<span class="hiddenSpellError" pre=""-->php endif; ?> <!--?<span class="hiddenSpellError" pre=""-->php if ( bp_is_active( 'blogs' ) && bp_core_is_multisite() ) : ?> php if ( bp_is_page( BP_BLOGS_SLUG ) ) : ?> class="selected"<!--?php endif; ?-->> <a href="<?<span class=">php echo site_url() ?>/<!--?php echo BP_BLOGS_SLUG ?-->/" title="<!--?php _e( 'Blogs', 'buddypress' ) ?-->"><!--?php _e( 'Blogs', 'buddypress' ) ?--></a> </li> <!--?<span class="hiddenSpellError" pre=""-->php endif; ?> <!--?<span class="hiddenSpellError" pre=""-->php wp_list_pages( 'title_li=&depth=1&exclude=' . bp_dtheme_page_on_front() ); ?> <!--?<span class="hiddenSpellError" pre=""-->php do_action( 'bp_nav_items' ); ?> </ul><!-- #nav --> There are somethings you'll need to edit to make sure your theme is working as you want it to with BuddyPress, this includes
To ensure your theme will still work if you disable BuddyPress we will be using the" if function exists" tag in php when adding BuddyPress specific code. Title TagThe <title> tag , to show the correct title information BuddyPress requires. BuddyPress requires the following code to show the correct title tags. [/php] We can add this code as shown below [php] HomepageAs I've shown in the previous Part to this guide adding the Activity to the homepage is very easy, for this example I'm going to do this to Twentyten, although the homepage is working perfectly well as it is, it's a matter of choice whether you change the homepage or not. Although the Activity Loop can merely be pasted into your index.php inside the div you wish, as Twentyten keeps its loop in a separate file I'll do the same when adding the activity loop. All this requires is copying the activity loop into a file named loop-activity.php, you can replace activity with any name you wish. Save the file in the themes folder. Next open up index.php on line 26 you'll see the code where the main loop is added. get_template_part( 'loop', 'index' ); You can either remove this code replacing it with get_template_part( 'loop', 'activity' ); or add it above or below the code. The activity should now be working on your homepage, although you may need to edit the css for it to display correctly. In Twentyten we have no need to. Removing the theme WarningWordPress will display a warning asking you to use a BuddyPress compatible theme until you add BuddyPress as a tag to the theme. To do this open up you r themes style.css and near the top you should see a line with tags, such as the following (taken from Twentyten) /* Theme Name: Twenty Ten Theme URI: http://wordpress.org/ Description: The 2010 default theme for WordPress. Author: the WordPress team Version: 1.0 Tags: black, blue, white, two-columns, fixed-width, custom-header, custom-background, threaded-comments, sticky-post, translation-ready, microformats, rtl-language-support, editor-style */ Add BuddyPress as a tag and the warning will go away. Removing the need for BP Template PackIf you don't want to depend on a plugin for your theme to work, some people do have reasons for this, although as Andy( the BuddyPress Core Developer) is the developer of BP Template Pack, I don't think you have to worry too much! None the less here is how to make your theme independent of The BP Template Pack. Deactivate BP Template Pack and you'll notice that the site still loads, although bits of the site are all over the place! Don't fret though we'll have that sorted in a few moments. By referring to the previous guide you should be able to add the css from admin.css and default.css Theming for BuddyPress isn’t as different and as difficult as some people think, once you follow a few simple guidelines it’s no harder than normal WordPress theme development. I hope now that you know this you’ll start work on a BuddyPress theme yourself. If you have any queries or need help with your theme let me know in the comments, I'd be more than happy to help!  |


| You are subscribed to email updates from 1stwebdesigner - Graphic and Web Design Blog To stop receiving these emails, you may unsubscribe now. | Email delivery powered by Google |
| Google Inc., 20 West Kinzie, Chicago IL USA 60610 | |
Comments (0)
Post a Comment