1stwebdesigner

Posted by | Posted on 17:32

1stwebdesigner


Discover What Type of Designer Are You?

Posted: 31 Aug 2010 02:00 PM PDT

Just like there are different client types, and different people in general – there are a few different types of designers. In this article we will have a look at some of the characteristics of some of these and give you some tips on how to improve. Hopefully you will have a few good tips on how you can become an even better designer when you’re done with this article!

Have you ever thought that you’re unique? Or felt that you’re just one of thousands out there struggling to get a project?

Picture by Piotr Bizior

Most likely, both of these statements are true. Many designers are out there trying to get their next project and most of them are in a way unique. Still there are some characteristics that we all have more or less of. By understanding some of these and knowing how to take advantage of your better sides while getting rid of the bad ones, you will be more likely to succeed!

Different Characteristics

Very few are just one single type. Most of us have some characteristics from several of these types, giving us hundreds of possible combinations. So we are indeed unique. Being one specific type doesn’t mean that you’re better than everyone else, or worse for that matter. The best way to be is a nice mix of different ones if possible. Even some of the more negative sounding types do have their positive sides. Now let’s have a look at one way to divide us into these types:

The Over-worker

Picture by Ivan Prole

More common within the ranks of fresh designers is the over-worker. This is the designer that spends a lot of time on even the smaller projects believing that this is the answer to everything. On the good side it’s always great when people try to make sure they’ve done the best they can. On the other hand this can be a dangerous path to go as you will have time for less projects during a month. If you’re being paid by the hour your designs will be more expensive than with several other designers and if you’re paid by the project there’s a good chance you’re working a lot for every dollar you get in. The key here is to learn when to say stop and getting more confident in what you do.

The Confident

Picture by ilker

Confident can be good. Actually it’s very good to some point. The confident designer knows that he’s doing well and sometimes dares to believe in his own gut feeling when making decisions. Balance is essential though. If you’re too confident you may be missing some important feedback from the client or not be critical enough to your own work.

The Nervous Wreck

Picture by Farmer Stephanie

I’ve met a few designers that are really nervous wrecks. They think that everything they do is bad or that clients will be unhappy with them no matter what they deliver. The confidence level is zero and I’ve many times thought that it must be really painful to have it this way. For some it can be just a matter of getting some quality feedback or polishing the skills a bit to feel more confident. Ask fellow designers for feedback, read up on what you do and do an evaluation of your routines. Maybe you’re someone who’s better off in another job?

The Average Designer

Picture by Celal Teber

As the title says this is the average one. By average I don’t mean bad, just someone who’s right there in the middle with thousands of others without standing out much. A lot of us manage well in this segment and get a nice share of projects on a regular basis. These designers live by current trends without daring to take too many risks. They have the basic skills and understanding and usually make an ok living from designing.

The Creative Mess

Picture by Richard Dudley

The creative mess has a lot of ongoing projects simultaneously. He/she often has many projects outside the design terms as well, along with personal projects and dreams – all in the creative field. This can be a dangerous path to walk down if you’re not able to get done with what you’re doing. Try to get balance (the next characteristic) and work on time management. Sometimes it can be hard, but necessary to realise that you can’t do everything you want always. Priorities have to be made.

The Balanced Creative

Picture by Kostya Kisleiko

This is the succesful version of the creative mess type. With a lot of ongoing projects, this designer knows that it takes priority and hard work. Having multiple projects can be a really good thing and this designer has found the secrets to how to balance all projects in a satisfying way.

The Unique

Picture by George Georgiades

This designer works more for the design than for the money (usually). A person that focuses on design that is uncommon and rarely seen. He doesn’t always have enough work but occasionally there comes huge projects along from clients that dare to go for his unique groundbreaking style. Often this designer works part-time.

The Trendsetter

Picture by Alessandro Paiva

Many times the trendsetter can own his own company or work with a bigger one. But these can also be freelancers. This type is the first one to start-up new trends and often has a lot of success. He can choose from many available projects at most times and is well-known in his niche. To be able to stay on top this designer will need to spend a lot of time reading up on what’s happening in the market, have the latest software and keep the skills polished.

The Ego-tripper

Picture by Robert Aichinger

Haven’t we all met them at some point? The designer who believes he is a trend setter or that his designs are absolutely awesome at all times. This person needs to be better to listen to feedback and be more realistic. Instead of attracting clients he will be likely to drive them away. Clients that re-buy are few and he doesn’t understand why as he is “perfect” in his own eyes.

The Copycat

Picture by Hilde Torbjornsen

There are some designers that copy others work almost for a living sometimes. This will eventually be discovered and is a really bad thing. It gives a horrible reputation and most of these designers have to stop doing business after a short time. The secret is to do your research properly and learn to use trends without copying someone elses work.

The Lucky One and the Unlucky One

Picture by Elke Rohn

This is many times more a myth than a fact in my opinion. I’ve many times hear someone say they don’t succeed because they have bad luck or that someone else succeeded because they were “really lucky”. Obviously you can have good and bad luck with everything you do, that’s a fact. But using it as an excuse is not the way to go. While some succeed or hit that one client that is great referral or has a lot of money, it all comes down to hard work. The harder you work, the bigger the chance is for success!

Conclusion

Picture by Joke van Zomeren

There are many types of designers, and you’re probably a combination of several of these. My advice to you is to have a look at these, make up your own opinion and work towards becoming the type you think is the best for you. I’m sure I’ve forgotten some characteristics, so feel free to leave your feedback for everyone to hear. By doing things your own way without blaming the situation and working hard instead, you will have a better chance at success!

Good luck!

( Which type are you? )

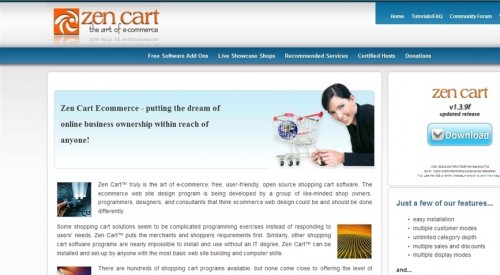
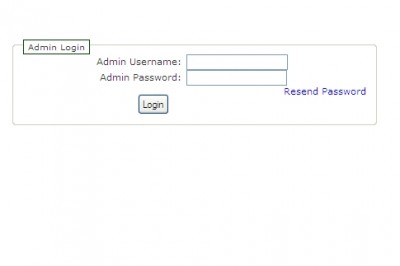
The Ultimate Guide to Getting Started with Zen Cart (Part 2)

Posted: 31 Aug 2010 03:00 AM PDT
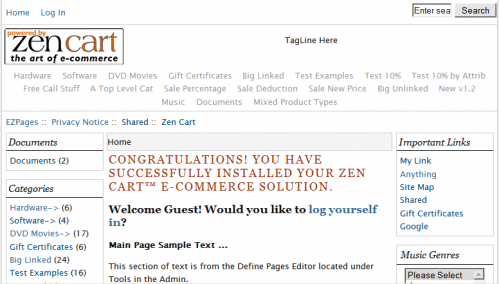
This article is the continued part 2 version of Getting Started with ZenCart. In part 1 we learned about ZenCart, and it’s basic files and getting started with the “Bare Bones” template. We also learned a little about the admin screen provided by ZenCart. In this part 2 version I will go more in depth about using and customizing ZenCart OpenSource Shopping Cart.

Custom logo of your e-Commerce Store

First we will go back to our files that we downloaded in part one. Within the header.php file we can see the following code:

header.php

 // added defines for header alt and text   define('HEADER_ALT_TEXT', 'Powered by Zen Cart :: The Art of E-Commerce');   define('HEADER_SALES_TEXT', 'TagLine Here');   define('HEADER_LOGO_WIDTH', '192px');   define('HEADER_LOGO_HEIGHT', '64px');   define('HEADER_LOGO_IMAGE', 'logo.gif'); 

You will notice that the logo width, and height is defined in this area, but we will also need to modify our template .CSS file to make it match to what we add here. This will tell the template what dimensions we want, and the css file will give the matched output. Changing one or the other and not both can sometimes output errors.

The logo image itself is located in the template directory under the “images” folder. The filename can be changed if you want, but again must be defined in the header.php file.

The Catalog Menu

You will be using this option in your admin panel to add and remove or modify products to your store. Though it is pretty straight forward I have still had many clients ask me to help them with it. It seems like if I explain it to someone, then they understand it and can do it themselves, so instead of assuming we can do this part – I will give a detailed explination. Be sure to make a note that even under the catalog menu, when items are added or modified – you will always have extra options that appear beside or below each item. I see many people a lot of times miss these extra options, then later wonder where to change something at. Please be sure to take a few minutes to look around on each screen to see what options are available to you.

Here is a list of each of the options available under the Catalog menu:

1. Categories / Products
This is the main part where you can add new categories to your store, and add/change/remove products that you have available for sale. Again, please check all the options available to you when you are under these sub-screens.

2. Product Types
This section will allow you to select a generic type of product you are listing – Either general, music, or digital download. This section by default is ok to leave alone unless you want to specify products into sub-areas.

3. Products Price Manager
This will be the area you modify prices in your store. You will add the prices when you add a product, but if you wish to modify any of that data later on, then you will need to visit this area to change it.

4. Option Name and Option Value Manager
For changing data that has been input already when adding items.

5. Reviews
This is where users will be leaving reviews and you will be able to moderate it. Check it often and be sure to approve comments and feedback being left by your visitors.

6. Specials
This is the section you will need to visit to add special discount deals to your website. It will display as showing the old price, then the new price highlighted in red to show it is a “special” or on sale item. You can set the variables for these items as well as moderate and edit them under this screen.

7. Featured Products
This is the area to add items that you want to be “featured” – If you choose the box under box layout that displays featured items either on your page, or your sidebar, then you can set the specifics for these items under this section. This is a good way to show items you want to sell either on your sidebar or main page. This can also be set to randomly show items each time the page is refreshed.

8. SaleMaker
Make your own sale, and choose how to run it. If you want to make everything 10% off or make it 50% off and last for 3 days then this is the section you need to visit. You can also specify categories and other variables within this page to specifically suit your needs.

9. Products Expected
This will show the items dates that are out of stock and expected back in. These variables can be set from a few different screens and modified under this section. If you are out of inventory on an item and want to change the status to show back in inventory then you will use this screen.

ZenCart Addon Modules

Many modules are available for ZenCart. Most of these can be found directly on the ZenCart website. Modules range from PayPal payment addons, to extra sidebar modules. Each of these serves a great purpose and can help out when customizing a ZenCart install. I have found a few modules that I usually install with each website I create with ZenCart. You can browse through the repository of modules by following the link [HERE]

Here are a few of my favorites:

1. Flat Rate Clone
2. Blank Sidebox
3. Ad Manager

Zen Cart Define Pages Editor

This is located in the admin panel of your ZenCart install. You can get to it by going to “tools” then selecting “Define Pages Editor” – This allows you to select a page and edit it within your ZenCart admin panel. This makes it easy to modify some of your other pages on your website. From here you can add information to your home page, or modify your terms and conditions or even your contact page.

The defualt available pages to edit are:

  • Checkout_Success
  • Conditions
  • Contact_Us
  • Discount_Coupon
  • Main_Page
  • Page_2
  • Page_3
  • Page_4
  • Page_not_Found
  • Privacy
  • ShippingInfo
  • Site_map

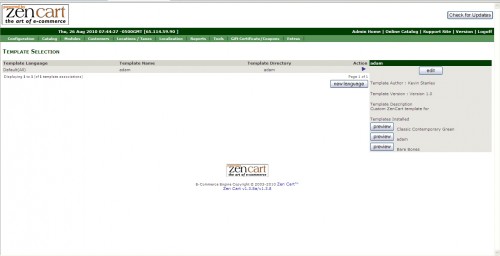
These are all self-explanitory, and when edited through your admin panel will show the changed results on your website. You can also choose to edit via text editor or HTML within your admin panel.

Zen Cart EZ-Pages

This is also in the admin panel under the “tools” menu option. This is an easy way to create new pages for your website. This option panel will also allow you to select where on your website the pages are located, and where the link to them is displayed. You can use this to create a bio page for your website, or even a different about page to give additional information about your company or website. EZ-Pages makes it very simple to add more to your website without having to code more template files. You can also edit the pages you have already created from here by selecting the “edit” button on the right side of the screen after selecting a page.

Custom Zen Cart Templates

For those of you looking to create a ZenCart Template or Theme from scratch – Here is the basic file structure that will need to be followed. You can either copy the default them and modify it from there, or even use the before-mentioned theme “Bare Bones” to create one as well. Most theme templates work the same as basic HTML and CSS – so with good knowledge of both of these you can easily create your own template.

 includes/languages/YOUR_TEMPLATE/english.php includes/languages/english/YOUR_TEMPLATE/index.php includes/languages/english/YOUR_TEMPLATE/header.php includes/templates/YOUR_TEMPLATE/template_info.php includes/templates/YOUR_TEMPLATE/common/tpl_header.php includes/templates/YOUR_TEMPLATE/common/tpl_footer.php includes/templates/YOUR_TEMPLATE/images/logo.gif includes/templates/YOUR_TEMPLATE/css/stylesheet.css 

Make sure when personalizing a template and creating one, you use the template_info.php file within your theme to tell ZenCart the information it will need for your files. Here is a quick look at the information:

 <?php /**  * Template Information File  *  * @package templateSystem  * @copyright Copyright 2003-2005 Zen Cart Development Team  * @copyright Portions Copyright 2003 osCommerce  * @license http://www.zen-cart.com/license/2_0.txt GNU Public License V2.0  * @version $Id: template_info.php 2306 2005-11-05 21:34:28Z wilt $  */ $template_name = 'Bare Bones'; $template_version = 'Version 1.0'; $template_author = 'Rowan Wigginton'; $template_description = 'Completely white with gray outlines.'; $template_screenshot = 'barebones_screenshot.png'; ?> 

The above example shows the name of the template (Which will also be displayed within your admin panel when selecting a template to use) As well as the version number, author, description, and a link to the screenshot. Creating your own template will require a file like the above example to ensure your information is properly processed to work as a template for ZenCart.

In Closing…

I hope everyone has enjoyed this two part article on starting with ZenCart. If there are any questions or requests then feel free to comment below and I will try to help out as much as possible. I have found ZenCart to be VERY powerful and a great opensource shopping cart platform to use on a variety of websites. Thank you for reading!


WebResourcesDepot

Posted by | Posted on 13:15

WebResourcesDepot


PHP RSS Reader Gets Better With New Version

Posted: 31 Aug 2010 02:20 AM PDT

PHP RSS Reader, a free application with a paid/premium version that was shared before at WRD, now has a new version with nice features.

The application can crawl any number of feeds and can organize them inside categories created.

Similar to how Google News does, it can now show related news articles appear below each new item, in clusters nice way of discovering more.

PHP RSS Reader

The premium version has the ability to categorize contents that include pre-defined keywords which is very useful if you're monitoring your brand or a specific subject.

That version also has a multi-user interface where each user can create his/her own feeds and vote on the stories displayed.

Who is it good for?

It fits to various scenarios:

  • creating a website from scratch which totally feeds from other sources.
  • a companion to a website for displaying content from other similar websites.
  • monitoring your brand or specific keywords from preferred sources (Twitter, newspapers and more).

P.S. The premium version also comes with an optional free installation.

Special Downloads:
Ajaxed Add-To-Basket Scenarios With jQuery And PHP
Free Admin Template For Web Applications
jQuery Dynamic Drag’n Drop
ScheduledTweets

Advertisements:
Professional XHTML Admin Template ($15 Discount With The Code: WRD.)
Psd to Xhtml
SSLmatic – Cheap SSL Certificates (from $19.99/year)

Tags: ,

Related posts

Hosted & Optimized JS Libraries – Cached Commons

Posted: 30 Aug 2010 11:54 PM PDT

Cached Commons is a repository of many JavaScript libraries that are cached, optimized and hosted on Github's CDN.

It is free for everyone and works by simply using the URLs mentioned (original or the minimized versions) as the script tag URLs.

Compared to the popular Google Libraries API, it hosts a much more number of libraries including many jQuery plugins, visualization or the ones for markup.

The only downside for now is that, there is only jQuery as a JS framework and hopefully, it'll start hosting others soon.

Cached Commons

Special Downloads:
Ajaxed Add-To-Basket Scenarios With jQuery And PHP
Free Admin Template For Web Applications
jQuery Dynamic Drag’n Drop
ScheduledTweets

Advertisements:
Professional XHTML Admin Template ($15 Discount With The Code: WRD.)
Psd to Xhtml
SSLmatic – Cheap SSL Certificates (from $19.99/year)

Tags:

Related posts


1stwebdesigner

Posted by | Posted on 17:02

1stwebdesigner


5 Killer Ways to Streamline your Coding Efficiency

Posted: 30 Aug 2010 02:00 PM PDT

I recently read a forum thread about designers and developers, and the hourly rates they charge. One commenter made a great point, saying that you can start to charge more per hour, if you are more efficient, and faster at producing quality work, as long as quality is not compromised for speed. Apart from practice, how can you actually speed up your coding you may be thinking. Well there are plenty options out there to aid you in doing so.

1. Snippets

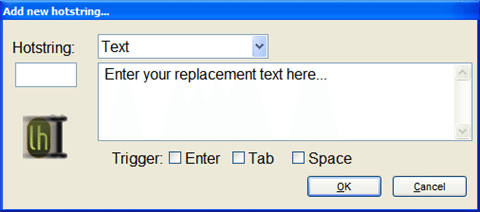
The first of these is having snippets at your finger tips. Programmers of high-end applications commonly make use of something called a module library; basically a library of pre-written, pre-tested code that can be inserted into their software. The benefits of this isn’t only faster coding, but faster error checking as well, as you know it is already tested to work. Why shouldn’t we, as web developers, also be making use of our own version of a module library?

There are pretty much 3 ways snippets can be organised, and used. The first is online, commonly via a website that will store your snippets as a database for everyone to share and use. Here are a few you might want to check out, while I’m sure there are plenty more quality options out there.

The second way is to have your own local database of useful snippets at your fingertips, instead of them being out there online, and everyone else’s being there too. There are plenty applications and so on to cover this, with this short round-up covering just a few.

2. Text expanders

The third and possibly best way to make use of your snippets is via a text expander. Think of them as a snippets library application on steroids. Basically, you set up your snippets so that you type a few characters, and then without leaving the keyboard, expand it into your full snippet. It will seriously revolutionise, and drastically increase the way, and speed that you code.

This article, and screen cast by Jeffrey Way gives you a visual view of the power a text expander puts at your finger tips, and is well worth a read. Having seen what you can achieve, here are several text expander applications that you may want to try out.

Editor’s Note: I highly suggest you to use Phrase Express instead of Texter. A far better option than its competitor.

3. Integrated Development Enviroment (IDE)

An Integrated Development Environment, or IDE as they are commonly refered to as, is basically like a well-developed environment to code your websites in. They often comes with great perks, which help you improve your coding, such as auto closing tags, code hints, and much more.  Lets take Aptana Studios – my favourite IDE – as an example by looking at what features it has to offer.

  • HTML, CSS, and JavaScript Code Assist – Code Assist helps you author HTML, CSS and JavaScript code more quickly. It supports all HTML elements and properties and generates suggestions and hints for CSS.
  • JavaScript Debugging – Aptana Studio integrates with Firebug for Firefox and Internet Explorer, offering multiple debugging options including breakpoints, stepping through code, DOM inspection, and more.
  • JavaScript Libraries – Support for popular JavaScript libraries and frameworks such as jQuery, prototype, scriptaculous, Ext JS and more. For each you get code assist, importable sample projects, and doc links at your fingertips.

  • DOM Outline View – View and navigate the DOM in this hierarchical outline of your HTML page. Select nodes to jump to that location in the editor. Filter nodes to see collections that match patterns.
  • File Transfer & Synchronization – Support for one-shot as well as keep-synchronized setups. Multiple protocols including FTP, SFTP and FTPS. Ability to automatically publish your websites to selected ISPs and hosting services.
  • Live Preview – Quickly switch between a view of your source code and the rendered HTML page in popular web browsers.

Compared to your code editors such as Notepad++ and so on, a web IDE such as this makes coding so much easier, as well as testing and so on. You rarely have to leave your coding environment for anything else! Check out these options below, or ask around to find out about many more, there are plenty out there.

4. Zen Coding

Zen Coding is a text editor plugin for many IDE’s and text editors out there that will seriously change the way you code. Think of it like a text expander, but for any code you want to write. Basically, you write out your blocks of code as css selectors, and then expand them. Zen coding will then swiftly turn this into proper html code! Take this for example.

 div#page>div.logo+ul#navigation>li*5>a 

This code would be turned into a fully fledged logo and navigation html structure for you to work from. Think of the typing, and tabbing time that can be saved across multiple html documents with this!

 <div id="page"> <div class="logo"></div> <ul id="navigation"> <li><a href=""></a></li> <li><a href=""></a></li> <li><a href=""></a></li> <li><a href=""></a></li> <li><a href=""></a></li> </ul> </div> 

Check out Zen Coding v0.5 from Sergey Chikuyonok on Vimeo to see live action of Zen Coding.

Zen Coding, as I’ve already mentioned is available for plenty different applications, including Aptana, Textmate, Coda, Expresso, Komodo Edit, Notepad++ and PSPad, with unofficial support in plenty others. Go get it here!

5. Frameworks

The final way you may want to improve your coding efficiency is via the use of a framework. There are plenty frameworks out there, for a variety of different things, but some of the main usages are for css layouts and a basic set up for you to start coding with. Think of all those things you type up, and repeat every time yo start a new project, or even a new html or css document. What about grid’s and class’s you set up in almost every project you code. Well what if they were already there every-time you started a project, saving you having to type them out again. That’s what so-called frameworks hope to solve. Some aim at css grids, some aim at having a html base, and so on. Check out some of these below to get an idea.

Further Discussion

Know of further ways to improve coding efficiency and speed? Get them down in the comments as always. It’s always great to get some further insight and thought’s on subjects such as these.

The Ultimate Guide to Getting Started with Zen Cart (Part 1)

Posted: 30 Aug 2010 03:00 AM PDT

In this article I will be covering the basic installation and functionality of ZenCart eCommerce shopping cart. I have been using ZenCart on clients eCommerce websites for a while and found the most common questions about installing, and modifying along with the most edited files to get you up and running with ZenCart. I will also cover some basic theme creation for ZenCart as well. This should be an excellent starting point for everyone looking to setup an online store and create a custom look and feel.

When I first started with ZenCart I found myself searching the web trying to find where the most simple things were located. Even for me on the ZenCart website itself I found it hard sometimes to find the simple answers I was looking for. I was looking for basic things like changing the page title, and editing the meta information. These small things seemed so hard to find at first. The more I found myself using ZenCart over the past year I have found out easy ways to change and modify it for each website I have it on. I learned that it actually wasn’t as hard as I was making it to begin with. Even though you can find most of the information online and different sources, I wanted to make an article that was a central location for doing the main things to install and setup ZenCart.

First things First

Now go grab a copy of ZenCart to install on your server. You can download the latest release by visiting here:
ZenCart Download
This will come with everything you need. The install is pretty straight forward. If there are any technical questions for those of you that have not installed a script of any kind before, then please see the help file documentation or visit the ZenCart website for installation help. I am going to assume that most of us here have installed a script before so I can move on to the good stuff.

Right After The Installation

Right after the installation you will now have your script up and running for the first time. You will notice that by visiting your site that you installed it on, there is a lot that seems to need changing. First off the ZenCart logo is in place, and all of the text on the page is aimed at ZenCart with links back to ZenCart. Considering that it’s free, I don’t mind seeing it all at first – But let’s get started. We will need to select a theme to use, as well as change the front page text, and add our meta information.

Let’s Get Started

To Start, I want to take a look at the file structure. There are a few main files that can be easily edited to modify many different things on our ZenCart powered website. To make it easier on myself I have found that downloading these files and saving them locally allow me to make changes on my desktop, then upload the modified files to my server via FTP to make the changes to my website.

Let’s start by downloading the following files using your ftp software and logging into your website:

 /includes/languages/english/index.php  /includes/languages/english/header.php  /includes/languages/english/meta_tags.php 

We will do more with these files later one, so be sure to save them where you can access them later on. These files will do most of the setup for your ZenCart installation. I will cover these each in more detail after we choose our theme and get the basic site setup to use.

Get that Template!

Now we will choose a theme. I have found one theme that I like the best. It is somewhat of a “framework” theme that is very easy to work with, and has always allowed me to make a custom site for every client I have used it for. The theme is called “Bare Bones” – This theme is basic, very easy to modify, and a perfect starting point for a custom ZenCart template. You can download the Bare Bones template by clicking [HERE]

Logging In To your ZenCart Installation

Now it is time to log in to your admin account of your ZenCart Install. To do this you will visit your website domain name then add the forward slash and “admin” – You can then use your login name and password that you set during the install of ZenCart to access the backend of your store.

This is where most of your business end will take place. From the Admin panel you can setup the “Boxes” or “Layout” of your site, as well as add / remove products for your store. We will start with a basic overview of the menu functions and screens to give you an idea of how it all works. First off let’s go change our template.

To Change your template in ZenCart use the menu and select “Tools” then select “Template Selection”

Now you can see the installed templates located on the right hand side of the screen. Selecting “Edit” on the right side of the admin panel will allow you to select and change templates within your ZenCart Install. Let’s select the Bare Bones template we have uploaded and activate it now by selecting “Update” below the drop down box.

Layout of the Site

Now to choose some layout options. Again at the top of the admin panel menu select “Tools” then select “Layout Boxes Controller”

Using this you can add change and remove different options that will be set for your ZenCart powered site. These are some basic functions that include the search option, as well as displaying newly added products. Make sure when you choose to turn the boxes on, you are also editing the options that appear on the right side of the admin panel. This allows you to choose options like where to place the box, and additional options for each individual box being placed on the site.

Getting Rid of those Banners

Now to remove the banners that are default with the ZenCart install. Again go to “Tools” Then “Banner Manager” – You can then click on each one displayed to de-activate them. You can add your own later if you want, but we will remove these to better help see our website and how to set it up for now.

Store Configuration

For this part you may want to spend some time viewing the options yourself. On the menu in the admin panel you can select “Configuration” and see the self explanitory options that are all below it. This will be the main area you can setup your store name, and store info. There are many other options that you will want to set under the configuration area. This will ensure your website is personalized to what you need.

Where are we now?

Ok, you should have a basic starting point now where your store looks really empty, and you have the files ready to start making it your own. Let’s go back to the files we downloaded earlier and take a quick look at each one and what they do. This step is important for making your ZenCart powered store SEO friendly, as well as making it custom to suit your needs. First we will look at the index.php file:

index.php

 php /**  * @package languageDefines  * @copyright Copyright 2003-2006 Zen Cart Development Team  * @copyright Portions Copyright 2003 osCommerce  * @license http://www.zen-cart.com/license/2_0.txt GNU Public License V2.0  * @version $Id: index.php 6550 2007-07-05 03:54:54Z drbyte $  */  define('TEXT_MAIN','This is the main define statement for the page for english when no template defined file exists. It is located in: <strong>/includes/languages/english/index.php</strong>');  // Showcase vs Store if (STORE_STATUS == '0') {   define('TEXT_GREETING_GUEST', 'Welcome <span class="greetUser">Guest!</span> Would you like to <a href="%s">log yourself in</a>?'); } else {   define('TEXT_GREETING_GUEST', 'Welcome, please enjoy our online showcase.'); }  define('TEXT_GREETING_PERSONAL', 'Hello <span class="greetUser">%s</span>! Would you like to see our <a href="%s">newest additions</a>?');  define('TEXT_INFORMATION', 'Define your main Index page copy here.');  //moved to english //define('TABLE_HEADING_FEATURED_PRODUCTS','Featured Products');  //define('TABLE_HEADING_NEW_PRODUCTS', 'New Products For %s'); //define('TABLE_HEADING_UPCOMING_PRODUCTS', 'Upcoming Products'); //define('TABLE_HEADING_DATE_EXPECTED', 'Date Expected');  if ( ($category_depth == 'products') || (zen_check_url_get_terms()) ) {   // This section deals with product-listing page contents   define('HEADING_TITLE', 'Available Products');   define('TABLE_HEADING_IMAGE', 'Product Image');   define('TABLE_HEADING_MODEL', 'Model');   define('TABLE_HEADING_PRODUCTS', 'Product Name');   define('TABLE_HEADING_MANUFACTURER', 'Manufacturer');   define('TABLE_HEADING_QUANTITY', 'Quantity');   define('TABLE_HEADING_PRICE', 'Price');   define('TABLE_HEADING_WEIGHT', 'Weight');   define('TABLE_HEADING_BUY_NOW', 'Buy Now');   define('TEXT_NO_PRODUCTS', 'There are no products to list in this category.');   define('TEXT_NO_PRODUCTS2', 'There is no product available from this manufacturer.');   define('TEXT_NUMBER_OF_PRODUCTS', 'Number of Products: ');   define('TEXT_SHOW', 'Filter Results by:');   define('TEXT_BUY', 'Buy 1 \'');   define('TEXT_NOW', '\' now');   define('TEXT_ALL_CATEGORIES', 'All Categories');   define('TEXT_ALL_MANUFACTURERS', 'All Manufacturers'); } elseif ($category_depth == 'top') {   // This section deals with the "home" page at the top level with no options/products selected   /*Replace this text with the headline you would like for your shop. For example: 'Welcome to My SHOP!'*/   define('HEADING_TITLE', 'Congratulations! You have successfully installed your Zen Cart&trade; E-Commerce Solution.'); } elseif ($category_depth == 'nested') {   // This section deals with displaying a subcategory   /*Replace this line with the headline you would like for your shop. For example: 'Welcome to My SHOP!'*/   define('HEADING_TITLE', 'Congratulations! You have successfully installed your Zen Cart&trade; E-Commerce Solution.'); } ?> 

It is easy with this file to remember one golden rule: If it starts with the word “DEFINE” then you can change the value for it. Make sure when editing these .php files you keep everything within the single quotes and don’t overwrite something by accident. It is good practice to back up files and keep local copies as well.

Let’s check out some of the most basic areas of the index.php file that we will want to change to start personalizing the ZenCart powered site:

index.php

 define('TEXT_MAIN','This is the main define statement for the page for english when no template defined file exists. It is located in: <strong>/includes/languages/english/index.php</strong>');  // Showcase vs Store if (STORE_STATUS == '0') {   define('TEXT_GREETING_GUEST', 'Welcome <span class="greetUser">Guest!</span> Would you like to <a href="%s">log yourself in</a>?'); } else {   define('TEXT_GREETING_GUEST', 'Welcome, please enjoy our online showcase.'); }  define('TEXT_GREETING_PERSONAL', 'Hello <span class="greetUser">%s</span>! Would you like to see our <a href="%s">newest additions</a>?');  define('TEXT_INFORMATION', 'Define your main Index page copy here.'); 

This is the main page information. You can change it to make it your own to fit your website as you need to. Some of the main page content can also be edited using the “Page Editor” from the admin panel – but for now we will stick to doing it this way. You will notice some of the text that is located in the above code, also displays within your website on the homepage.

The lower portion of this file contains more areas you can define. Some of these are more detailed. Let’s take a look at it:

index.php

 if ( ($category_depth == 'products') || (zen_check_url_get_terms()) ) {   // This section deals with product-listing page contents   define('HEADING_TITLE', 'Available Products');   define('TABLE_HEADING_IMAGE', 'Product Image');   define('TABLE_HEADING_MODEL', 'Model');   define('TABLE_HEADING_PRODUCTS', 'Product Name');   define('TABLE_HEADING_MANUFACTURER', 'Manufacturer');   define('TABLE_HEADING_QUANTITY', 'Quantity');   define('TABLE_HEADING_PRICE', 'Price');   define('TABLE_HEADING_WEIGHT', 'Weight');   define('TABLE_HEADING_BUY_NOW', 'Buy Now');   define('TEXT_NO_PRODUCTS', 'There are no products to list in this category.');   define('TEXT_NO_PRODUCTS2', 'There is no product available from this manufacturer.');   define('TEXT_NUMBER_OF_PRODUCTS', 'Number of Products: ');   define('TEXT_SHOW', 'Filter Results by:');   define('TEXT_BUY', 'Buy 1 \'');   define('TEXT_NOW', '\' now');   define('TEXT_ALL_CATEGORIES', 'All Categories');   define('TEXT_ALL_MANUFACTURERS', 'All Manufacturers'); } elseif ($category_depth == 'top') {   // This section deals with the "home" page at the top level with no options/products selected   /*Replace this text with the headline you would like for your shop. For example: 'Welcome to My SHOP!'*/   define('HEADING_TITLE', 'Congratulations! You have successfully installed your Zen Cart&trade; E-Commerce Solution.'); } elseif ($category_depth == 'nested') {   // This section deals with displaying a subcategory   /*Replace this line with the headline you would like for your shop. For example: 'Welcome to My SHOP!'*/   define('HEADING_TITLE', 'Congratulations! You have successfully installed your Zen Cart&trade; E-Commerce Solution.'); } ?> 

These defined objects will allow you to change the terms used on the website such as “weight” – “product name” – “price” and etc. If you wanted them to display differently you could simply change the name within the single quotes and it will display that way on your website.

Below this list of defined objects you will see where there are two titles available to change. Both are located on your website homepage.

index.php

 } elseif ($category_depth == 'top') {   // This section deals with the "home" page at the top level with no options/products selected   /*Replace this text with the headline you would like for your shop. For example: 'Welcome to My SHOP!'*/   define('HEADING_TITLE', 'Congratulations! You have successfully installed your Zen Cart&trade; E-Commerce Solution.'); } elseif ($category_depth == 'nested') {   // This section deals with displaying a subcategory   /*Replace this line with the headline you would like for your shop. For example: 'Welcome to My SHOP!'*/   define('HEADING_TITLE', 'Congratulations! You have successfully installed your Zen Cart&trade; E-Commerce Solution.'); 

Changing the values for these will change more information on your homepage. Setting these to give custom welcome messages are a good start to customizing your ZenCart install. This is all a good starting point to setting up your online store.

Moving On

Next we will take a look at the header.php file we downloaded.

header.php

 <?php /**  * @package languageDefines  * @copyright Copyright 2003-2006 Zen Cart Development Team  * @copyright Portions Copyright 2003 osCommerce  * @license http://www.zen-cart.com/license/2_0.txt GNU Public License V2.0  * @version $Id: header.php 2940 2006-02-02 04:29:05Z drbyte $  */  // header text in includes/header.php   define('HEADER_TITLE_CREATE_ACCOUNT', 'Create Account');   define('HEADER_TITLE_MY_ACCOUNT', 'My Account');   define('HEADER_TITLE_CART_CONTENTS', 'Shopping Cart');   define('HEADER_TITLE_CHECKOUT', 'Checkout');   define('HEADER_TITLE_TOP', 'Top');   define('HEADER_TITLE_CATALOG', 'Home');   define('HEADER_TITLE_LOGOFF', 'Log Out');   define('HEADER_TITLE_LOGIN', 'Log In');  // added defines for header alt and text   define('HEADER_ALT_TEXT', 'Powered by Zen Cart :: The Art of E-Commerce');   define('HEADER_SALES_TEXT', 'TagLine Here');   define('HEADER_LOGO_WIDTH', '192px');   define('HEADER_LOGO_HEIGHT', '64px');   define('HEADER_LOGO_IMAGE', 'logo.gif');  // header Search Button/Box Search Button   define('HEADER_SEARCH_BUTTON','Search');   define('HEADER_SEARCH_DEFAULT_TEXT', 'Enter search keywords here');  ?> 

Using this file we can change our header text, our search field text as well as the search button itself, and the logo for our website. Titles are defined in this file for use across the store. We will get more into changing the logo and customizing the header later on. Let’s look at the other files we have downloaded:

Meta_Tags.php

 <?php /**  * @package languageDefines  * @copyright Copyright 2003-2008 Zen Cart Development Team  * @copyright Portions Copyright 2003 osCommerce  * @license http://www.zen-cart.com/license/2_0.txt GNU Public License V2.0  * @version $Id: meta_tags.php 10330 2008-10-10 20:14:32Z drbyte $  */  // page title define('TITLE', 'Zen Cart!');  // Site Tagline define('SITE_TAGLINE', 'The Art of E-commerce');  // Custom Keywords define('CUSTOM_KEYWORDS', 'ecommerce, open source, shop, online shopping');  // Home Page Only:   define('HOME_PAGE_META_DESCRIPTION', '');   define('HOME_PAGE_META_KEYWORDS', '');    // NOTE: If HOME_PAGE_TITLE is left blank (default) then TITLE and SITE_TAGLINE will be used instead.   define('HOME_PAGE_TITLE', ''); // usually best left blank  // EZ-Pages meta-tags.  Follow this pattern for all ez-pages for which you desire custom metatags. Replace the # with ezpage id. // If you wish to use defaults for any of the 3 items for a given page, simply do not define it. // (ie: the Title tag is best not set, so that site-wide defaults can be used.) // repeat pattern as necessary   define('META_TAG_DESCRIPTION_EZPAGE_#','');   define('META_TAG_KEYWORDS_EZPAGE_#','');   define('META_TAG_TITLE_EZPAGE_#', '');  // Per-Page meta-tags. Follow this pattern for individual pages you wish to override. This is useful mainly for additional pages. // replace "page_name" with the UPPERCASE name of your main_page= value, such as ABOUT_US or SHIPPINGINFO etc. // repeat pattern as necessary   define('META_TAG_DESCRIPTION_page_name','');   define('META_TAG_KEYWORDS_page_name','');   define('META_TAG_TITLE_page_name', '');  // Review Page can have a lead in:   define('META_TAGS_REVIEW', 'Reviews: ');  // separators for meta tag definitions // Define Primary Section Output   define('PRIMARY_SECTION', ' : ');  // Define Secondary Section Output   define('SECONDARY_SECTION', ' - ');  // Define Tertiary Section Output   define('TERTIARY_SECTION', ', ');  // Define divider ... usually just a space or a comma plus a space   define('METATAGS_DIVIDER', ' ');  // Define which pages to tell robots/spiders not to index // This is generally used for account-management pages or typical SSL pages, and usually doesn't need to be touched.   define('ROBOTS_PAGES_TO_SKIP','login,logoff,create_account,account,account_edit,account_history,account_history_info,account_newsletters,account_notifications,account_password,address_book,advanced_search,advanced_search_result,checkout_success,checkout_process,checkout_shipping,checkout_payment,checkout_confirmation,cookie_usage,create_account_success,contact_us,download,download_timeout,customers_authorization,down_for_maintenance,password_forgotten,time_out,unsubscribe,info_shopping_cart,popup_image,popup_image_additional,product_reviews_write,ssl_check');  // favicon setting // There is usually NO need to enable this unless you need to specify a path and/or a different filename //  define('FAVICON','favicon.ico');  ?> 

There are a few main things we will change in the meta_tags.php file.

 // page title define('TITLE', 'Zen Cart!');  // Site Tagline define('SITE_TAGLINE', 'The Art of E-commerce');  // Custom Keywords define('CUSTOM_KEYWORDS', 'ecommerce, open source, shop, online shopping'); 

The above code is what will help with SEO for your ZenCart powered site. Changing the page title, tagline, and adding keywords is very important. This will help your site be seen later by search engines and also to display to visitors what your website is and has to offer.

The other thing I want to point out within the meta_tags.php file is the favicon. The favicon image is the tiny icon that appears on your toolbar next to where you type your http://www -

This area at the bottom of the meta_tags.php defines that for us, so we can easily add a favicon.ico image to be displayed on our site:

Meta_Tags.php

 // favicon setting // There is usually NO need to enable this unless you need to specify a path and/or a different filename //  define('FAVICON','favicon.ico'); 

So What is Next?

Next in part two I will cover the following items:

1. Adding a custom logo to your ZenCart powered website.

2. The catalog menu for adding products to your website.

3. Extra addon modules available and how to edit them.

4. Define Pages Editor for custom pages

5. Custom Templates and File Structure of templates

Stay tuned for the second part of this tutorial. If there is something else you would like to see or if you have any questions then feel free to comment below. I will respond and help out as much as I can. I hope everyone enjoys!