1stwebdesigner

Posted by | Posted on 18:34

1stwebdesigner


45+ Must Have iPhone Applications for Developers and Designers

Posted: 29 Jun 2010 02:00 PM PDT

Every iPhone owner should know that he/she possesses a device which is more that just a cell phone to call or text.You can use it as your second computer when you are not at your home or office, and we think this was the purpose of creating iPhone. It has great interface and superb Wi-Fi compatibility which places it in Elite class among other mobile devices. “iPhone as a computer” happens mainly because of its applications, you can have any application you like whether it is related to entertainment or your work. If you are a web developer or a graphic designer and you own an iPhone, then you can take advantage of your mobile phone by using important and essential applications designed specially for you people to help you if you’re in state of mobility.

Finding these kind of applications can be a very difficult task but today we have done this task for you people. We have collected some of the most useful and helpful iPhone applications for developers and designers which can help you when you are out of your office desk.

1. WordPress


WordPress is the most popular publishing platform, now you can use it directly from your iPhone for free. You can create new posts or edit the existing ones, add photos, check spelling and create links without writing HTML codes.

2. PHOTOSHOP


Photoshop is leading photo-editing software. Now you can use it on you iPhone by just installing this FREE application. It has all important features for photo-editing like crop, rotate, change color and if you have done something wrong then you can undo your recent actions.

3. Database Viewer Plus


This application Synchronize any desktop side database with you iPhone. This allows to sync with Microsoft Access, Microsoft Excel and any ODBC compliant database like Oracle.

4. CameraBag


CameraBag let you edit you photos and give effects for the new ones. You can use the option panel to set camera behavior, image size, cropping and boarder effects and more. It costs $1.99.

5. 1Password


Every iPhone user uses password manager, but if you don't then this is the application you should use for managing you passwords and identity. It has more than 1 million users and costs $6.99.

6. Analytics App


Google Analytics is very important for every web developer. This application gives you the opportunity to access your Google Analytics data from anywhere using your iPhone.

7. Pingdom for iPhone


Pingdom is an uptime monitoring service and this application will help you to connect to it from your iPhone. You can get alerts directly to your iPhone, view current status of monitored sites, view uptime and response time stats and get information about each check such as monitoring resolutions.

8. GoodReader


GoodReader allows you to read huge PDF and TXT files. It extracts pure text from PDF files and automatically wraps words. It offers full screen reading without bars or buttons.

9. PayPal


PayPal for iPhone can make your life easy, when you want to send money instantly when you are not near your desktop, you can use this application for this purpose.

10. Photobucket


Every web and graphic designer has a deep relation with Photobucket and what a pleasure it will be if you can use it on your iPhone. Using this application you can search Photobucket media library, download any photo and manage you albums.

11. Evernote


Evernote lets you create notes, snap photos and record voice memos that you can access any time from you iPhone, computer or web. This application is free.

12. FTP On The Go


If you website need some fixes and modification and you are not you desk then this application will helps you. This application lets you login into your sever from your iPhone.

13. Ego


Ego provides you the pleasure of one central location to check web stats which you like to view. You can quickly view the number of visits to your website, feeds subscription total and changes, how many people are following you on twitter. It supports Ember, FeedBurner, Google Analytics, Mint, Squarespace, Tumblr, Twitter and Vimeo. It costs $1.99.

14. Dropbox


Dropbox is a very famous online backup service and now you can use it from you iPhone. You can access you Dropbox, View documents, videos or photo galleries. Share and send files via email, text message or copy paste links to use in another application. This app is free.

15. Tweetie


Tweetie is very powerful Twitter client which offers variety of different features. You can handle multiple Twitter accounts. You can work offline and your actions will be synced as soon as you go online.

16. BlogPress


BlogPrees is a real-time blogging application which supports most of mainstream blogging platforms like WordPress and Blogspot. You can upload multiple photos in your posts; send same post to multiple blogs, and many more features you are looking for.

17. Brushes


Brushes is a painting application featuring advance color picker, several realistic brushes, multiple layers, extreme zooming and simple interface.

18. Source Viewer


This Source Viewer application enables you to view HTML, CSS and JavaScript source code of any website. This application costs $0.99.

19. iMy


iMy is a full MySQL client for the iPhone. It features the ability to generate complex queries, save them for future use, export query results to Google spreadsheets. Many more features are included. It costs $5.99.

20. iWiki


iWiki enables you to read and browse Wikipedia on your iPhone. It offers 32 different languages. You can same articles for reading without the internet connection and view your previous browsing history. It costs $1.99.

21. TouchTerm


TouchTerm is a fully featured SSH terminal application interface that enables remote access on their iPhone. It's worth $3.99

22. Harvest for iPhone


I think every one is familiar with Harvest; it is a simple online time tracking, time-sheet and reporting software. Now you can use it on your iPhone.

23. Web Developer Bible


This is a very handy reference for all web developers also containing RGB to HEX color converter. It also has Silent Mode Reminder and Vedic Mathematics. It is free for use.

24. cliqcliq Colors


"Colors" by cliqcliq is an easy-to-use color picker application for converting, managing and discovering colors and palettes. This application costs $2.99.

25. Color Expert


Color Expert is an interactive color wheel, image picker and swatch book for you iPhone. It includes Monochromatic, analogous, complementary and triadic color schemes. Color palettes include RGB, CMYK and library Values. This application costs $9.99.

26. Color Stream


Color Stream is an other color tool for iPhone. It can generate a combination of colors from a picture. You can save multiple color palettes, save them and rate them. It costs $2.99.

27. CSS Cheat Sheet


Every Cascading Style Sheet developer needs a quick refresher of all CSS properties and values. This application provides a quick reference for topics you have already learned but need few reminders. It costs only $0.99.

28. jQuery Cheat Sheet


jQuery Cheat Sheet is a quick course refresher of jQuery syntax and arguments which costs $0.99

29. HTML Cheat Sheet


A very useful application for web developers, which needs quick reference to HTML tags, attributes and more. It costs $0.99.

30. PHP Cheat Sheet


PHP cheat sheet is a quick refresher of all PHP functions and syntax. You can use it to revise you PHP skills or learn PHP from if you are a beginner.

31. WhatTheFont


This application is very handy to identify the fonts in a photo or web graphic. If you are looking at a very beautiful font and wonders what font it is. Just snap a photo and this application will identify the font.

32. HTML Colors


HTML Colors allows you to easily select and preview HTML colors and their codes for use in a web page.

33. HEX RGB Colors Guide


A wonderful reference, to RGB and HEX colors, app suitable for anyone who deals with colors, including: web designers, bloggers, print designers and virtually anyone who uses colors to publish. It costs $1.99

34. Read It Later


This iPhone application lets you save pages and download copies of pages so you can read later when you are in offline mode.

35. Things


"Things" is an iPhone application for efficient Task Management. You can make the list of things you want to complete today in "Today" list, "Next" list contains anything you want to do soon and use "Scheduled" for all to-dos that you want to start at a later date.

36. Pingle


Pingle is very useful application which enables you to update your status on social networking sites like Facebook, Twitter, MySpace, Flickr, FriendFeed, Delicious, Tumblr and more. This application costs $1.99.

37. Network Ping


This software is used for maintaining and debugging network problems on LAN. Its lite version is free and normal version is of $3.99.

38. Twitterrific

Twitterrific is an other application that let you read and publish your “Tweets”.

39. Tap Forms


This is the very powerful database application for iPhone. You can use this to keep track of your favorite websites or bookmarks. It has many Ready Made Forms like credit card numbers, bank account, software serial number etc. It has built-in FTP servers to exchange data with Mac or PC.

40. iWantMyName


IWantMyName is a free application which helps you to register domain names directly from you iPhone.

41. The Typography Manual


The Typography Manual is a pocket resource for graphic designers and anyone that works with type. It provides all the essentials of a book reference on your iPhone. This application costs $3.99.

42. MiniBooks


MiniBooks for the iPhone lets you access your FreshBooks, which is a leading time tracking and online invoicing software. This application will cost you $14.99 but will save a lot if you can track your time effectively.

43. Mint Stats


Mint Stats enables you to monitor you website's statistics and see how many people visited your website today or in last hour. This application is free.

44. Ruler


Using this free application you can measure any object by simply placing it on or next to screen of iPhone. You can switch inches and centimeter mode of measurement.

45. Full Screen Web Browser


This application helps you to browse the web free from clutter. This application hides all the buttons, address and status bar providing you 40% more space to browse. It costs $0.99.

46. Web Source Viewer


As name signifies, it is a free and very simple application to display web source of any website.

47. Byline


Byline is a RSS and Atom Feeds reader for reading latest news and articles from you favorite sites and blogs when you are offline. You need to use you Google Reader account for his purpose. This app costs $4.99.

How to Build a Distance Finder with Google Maps API

Posted: 29 Jun 2010 03:00 AM PDT
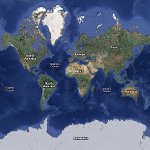
Google maps is a free web mapping service application provided by Google. It offers lots of cool features (showing various map types, plotting points, showing routes, geocoding addresses). You can also add all these features to your website using the Google Maps APIs provided by Google. In this tutorial I will show you how to add some of these features to your site. I will be using the Google Maps Javascript API v3 (the newest version).

What are we going to build?

We’ll make a distance finder. We’ll add a Google map to our site, plot two points on it (the user will be able to choose the addresses for these points), compute the distance between them and show the quickest route between them.

You can see the demo of application here. Also, you can download the source code using this link.

Prerequisites

The first thing you need to do in order to use the API from Google is requesting an API key. You can do this here. It’s easy and free!

Creating the web form for getting the two addresses

We’ll create a simple html form for the user to write the two addresses. We’ll add two input boxes and a button to the form. When the user presses the “Show” button, the map with the two locations will be shown.

Here’s the code for this:

 <table align="center" valign="center"> <tr>    <td colspan="7" align="center"><b>Find the distance between two locations</b></td> </tr> <tr>    &nbsp; </tr> <tr>    <td>First address:</td>    &nbsp;    <input name="<span class=" type="text" />address1" id="address1" size="50"/>    &nbsp;    <td>Second address:</td>    &nbsp;    <input name="<span class=" type="text" />address2" id="address2" size="50"/> </tr> <tr>    &nbsp; </tr> <tr>    <td colspan="7" align="center"><input type="button" value="Show" onclick="initialize();"/></td> </tr> </table> 

The ‘initialize’ JavaScript function will be called when pressing the button. The function will show the map. In the next section I’ll show you how.

We also need to add a div tag to our page, where the map will be shown:

<div id="map_canvas" style="width:70%; height:54%"></div>

We will also need two div tags for showing the distances we will compute:

<div style="width:100%; height:10%" id="distance_direct"></div> <div style="width:100%; height:10%" id="distance_road"></div>

Showing the map

The first thing we need to do is to find the coordinates (latitude and longitude) for the two addresses. Luckily, Google Maps will help us! Here’s what we have to do:

We’ll use the geocoder object for this. First, we’ll have to create a new geocoder object.

geocoder = new google.maps.Geocoder();

After this, we’ll get the two address values from the form. Like this:

address1 = document.getElementById("address1").value; address2 = document.getElementById("address2").value;

Then, we’ll use the following code to call the geocode method on the geocoder object. We’ll pass it the addresses one by one and save the results in the variables called location1 and location2 (these will hold the coordinates of the two addresses).

if (geocoder) {    geocoder.geocode( { 'address': address1}, function(results, status)    {       if (status == google.maps.GeocoderStatus.OK)       {          //location of first address (latitude + longitude)          location1 = results[0].geometry.location;       } else       {          alert("Geocode was not successful for the following reason: " + status);       }    });    geocoder.geocode( { 'address': address2}, function(results, status)    {       if (status == google.maps.GeocoderStatus.OK)       {          //location of second address (latitude + longitude)          location2 = results[0].geometry.location;          // calling the showMap() function to create and show the map          showMap();       } else       {         alert("Geocode was not successful for the following reason: " + status);       }    }); }

You will notice that we’ve called the showMap() function when the coordinates for the second address are retrieved. This function will set the options for the map and show it.

We’ll now compute the coordinates for the center of the map. The center point will be between our two points.

latlng = new google.maps.LatLng((location1.lat()+location2.lat())/2,(location1.lng()+location2.lng())/2);

Next, we’ll show the map. We have to create a new map object and pass it some parameters (set using the mapOptions variable): the zoom level, the center and the type of the map.

var mapOptions = {    zoom: 1,    center: latlng,    mapTypeId: google.maps.MapTypeId.HYBRID };  map = new google.maps.Map(document.getElementById("map_canvas"), mapOptions);

The next thing we’ll do is to show the quickest route between our locations. We’ll use a DirectionsService object from google maps for this. Here’s how the code looks:

directionsService = new google.maps.DirectionsService(); directionsDisplay = new google.maps.DirectionsRenderer( {    suppressMarkers: true,    suppressInfoWindows: true }); directionsDisplay.setMap(map); var request = {    origin:location1,    destination:location2,    travelMode: google.maps.DirectionsTravelMode.DRIVING }; directionsService.route(request, function(response, status) {    if (status == google.maps.DirectionsStatus.OK)    {       directionsDisplay.setDirections(response);       distance = "The distance between the two points on the chosen route is: "+response.routes[0].legs[0].distance.text;       distance += "The aproximative driving time is: "+response.routes[0].legs[0].duration.text;       document.getElementById("distance_road").innerHTML = distance;    } });

We’ve first created the objects we need. We then set some options for displaying the route, we’ve chosen not to show markers and info boxes (we’ll create our own ones);

suppressMarkers: true, suppressInfoWindows: true

We’ve created a request object and set the origin and destination for the route and also the travel mode:

var request = {    origin:location1,    destination:location2,    travelMode: google.maps.DirectionsTravelMode.DRIVING };

We’ve then called the route function and obtained a response from the server. Using this response we’ve plotted the route on the map and written some info (the total distance and aproximative driving time) in one of the divs we’ve created:

directionsDisplay.setDirections(response); distance = "The distance between the two points on the chosen route is: "+response.routes[0].legs[0].distance.text; distance += "The aproximative driving time is: "+response.routes[0].legs[0].duration.text; document.getElementById("distance_road").innerHTML = distance;

We’ll also show a line between our points and compute the distance between them (the distance on a straight line, in kilometers). To show a line we’ll use a Polyline object from google maps and set some options for it (the map it belongs to, the path, the width, the opacity and the color):

var line = new google.maps.Polyline({    map: map,    path: [location1, location2],    strokeWeight: 7,    strokeOpacity: 0.8,    strokeColor: "#FFAA00" });

We’ll now compute the distance between two points using their coordinates and show the result inside the other div tag we’ve created.

var R = 6371; var dLat = toRad(location2.lat()-location1.lat()); var dLon = toRad(location2.lng()-location1.lng()); var dLat1 = toRad(location1.lat()); var dLat2 = toRad(location2.lat()); var a = Math.sin(dLat/2) * Math.sin(dLat/2) +         Math.cos(dLat1) * Math.cos(dLat1) *         Math.sin(dLon/2) * Math.sin(dLon/2); var c = 2 * Math.atan2(Math.sqrt(a), Math.sqrt(1-a)); var d = R * c;  document.getElementById("distance_direct").innerHTML = "The distance between the two points (in a straight line) is: "+d;

The last thing we’ll do is show a marker and an info window for each location. We’ll create two marker objects (the options we’ll set are: the map it belongs to, the coordinates and a title):

var marker1 = new google.maps.Marker({    map: map,    position: location1,    title: "First location" });  var marker2 = new google.maps.Marker({    map: map,    position: location2,    title: "Second location" });

Next, we’ll create variables to hold the texts to print in the info windows, create two info window objects (we’ll add the texts to them using the content option) and we’ll add two event listeners which will show the appropriate info window when the user clicks on the markers:

// create the text to be shown in the infowindows  var text1 = ' <div id="content">'+</div>   '<h1 id="firstHeading">First location'+   '<div id="bodyContent">'+   '<p>Coordinates: '+location1+'</p>'+   '<p>Address: '+address1+'</p>'+   '</div>'+   '</div>';  var text2 = ' <div id="content">'+</div>   '<h1 id="firstHeading">Second location'+   '<div id="bodyContent">'+   '<p>Coordinates: '+location2+'</p>'+   '<p>Address: '+address2+'</p>'+   '</div>'+   '</div>';  // create info boxes for the two markers var infowindow1 = new google.maps.InfoWindow({    content: text1 }); var infowindow2 = new google.maps.InfoWindow({    content: text2 });  // add action events so the info windows will be shown when the marker is clicked google.maps.event.addListener(marker1, 'click', function() {    infowindow1.open(map,marker1); });  google.maps.event.addListener(marker2, 'click', function() {    infowindow2.open(map,marker2); });

And we’re done! We now have a distance finder! Let me know if you have any questions!

Comments (0)

Post a Comment