

1stwebdesigner |

| 70 Insanely Beautiful Dual Screen Wallpapers Posted: 02 Aug 2010 02:00 PM PDT
By viewing image in a dual screen you can display your image in a wider scale and you can also set higher resolutions which greatly increases the clarity of the image and gives a stunning visual appeal to the viewer. Not only in displaying wallpapers but you can use the concept of dual screens where you can edit the changes in one screen and view the results in another.If you are a web designer or really like to play with different moods of nature, this concept could give you an environment where you could show the nature changing its colors in a subtle manner in two wide screens. Not only the moods you could also show the changing climate with the help of additional monitors and if in a classroom showing a demonstration you could have anatomy of a flower in one screen and the description part in another screen.The below presentation of “Beautiful dual screen wallpapers“are in different categories of resolutions up to 2560 x 1024 px and resources of where to collect these. Nature categories1.Butterfly dual effectEnjoying the sweet nectar on a bright sunny day. 2.Pale orchid in dual screen3.Bunch of roses4.Spring Pink5.Yellow in its Brightness6.Orchid7.Majestic Sunset horizon8.Bright Nature9.West CoastGoodbye for Today. 10.Tulips11.West Lake at Sunset12.Yellow OneAnimals and Birds13.Tiger’s Look14.Lizard on a TrunkEnjoying the same color. 15.Racoon16.Where is my Predator?17.Hey You18.Three Brother WolvesHappy in our friendship. 19.Stare of a TigerPride of a tiger – Looks. 20.LizardRelishing the warmth of nature . 21.White Tiger22.Parrot23.Black BeautyA rare combination of nature with its varied colors in this black beauty. 24.Flamingos25.OdonataFantasy ArtFantasy art is high and strongly linked to fantasy fiction. Indeed fantasy art pictures are often intended to represent specific characters or scenes from works of fantasy literature. Such works created by amateur artists may be called fan art. 26.The Big Reveal27. Morning View28. An Untamed horse29.A Dreamy Scene30.Strange World31.Hazy view32.A Dreamy World in Wide Screen33.Dreamy World34.Back Draft35.Wind Mill36.Sunset over Moorea37.All alone in this World38.Blue Forest39.To NowhereAbstract wallpapersAbstract wallpaper, non figurative wallpaper, nonobjective wallpaper, and nonrepresentational wallpaper are loosely related terms. They are similar, although perhaps not of identical meaning.Abstraction indicates a departure from reality in depiction of imagery in art. 40.Mushroom Samba41.Dual monitor floral42.Swirlz43.14 the War44.Splash of paintFlow of paint as a wonderful painting. 45.Splash46.Jincy47.Display of bright colors48.Feeding Time49.Plasmoid Neophile50. Generator51.Destruction52.Bokeh Remix53.Apple i-pad3D dual screen wallpapersOne important interesting wallpaper category is three dimensional (3D) desktop backgrounds.Here we bring our best. 54.Boy & Butterfly55.Classic Design56.Skull Cog57.Water Colored58.Fedora59.Six of a kind60. Abstract Pink61.Greatest Invention62.RTX Wallapaper63.Multi Display NightsMiscellaneousMade up of a variety of parts or ingredients having a variety of characteristics, abilities, or appearances. 64.Spawning sunflowers65.Ghost view66.Super Mario Galaxy67.Crocket Red Dual68.Cat Wallpaper69.Tropical isle70.Yin and YangFurther Resources & Origin1. Dualmonitorbackgrounds 2. Dualscreenwallpaper 3. Wallpaperpimper 4. 3datadesign 5. Pni.princeton 6. Hongkiat 7. Instantshift To refresh your memory and to spice up your desktop with a list of wallpapers. For Widescreen and Breathtaking dual screen wallapapers visit the link.. 9. Plasmadesign 10. Wallcoo 11. Wall.alphacoders 12. Digitalblasphemy 13. Mandolux 14. 2expertsdesign More than 600 designs to give a tough test to your choice. 15.Ewallpapers This site boasts of more than 600 images in resolutions of 2560 x 1024 categorised under different headings. 16. Epicwallpaper 17. Socwall    |
| jQuery for Complete Beginners: Part 4 Posted: 02 Aug 2010 03:00 AM PDT
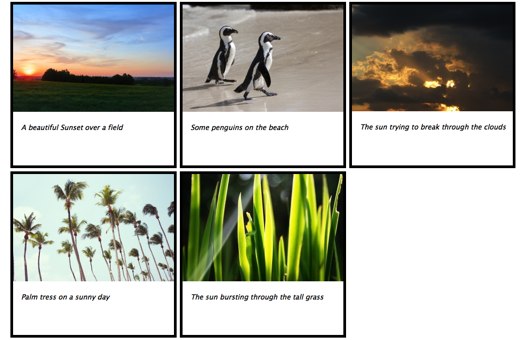
Firstly, open up a new HTML page, add the basic HTML code and then include jQuery like so: <script src="http://ajax.googleapis.com/ajax/libs/jquery/1/jquery.min.js" type="text/javascript" charset="utf-8"></script> <script type="text/javascript"> </script> I’ve also added another script tag that is blank. This is where our code will go. Notice that when I included jQuery from the Google CDN (we covered this back in the first post) I’ve used “jquery/1/jquery.min.js”. Using just “1″ means we will automatically be given the most recent version of jQuery, until we get to jQuery 2, which is a fair way off for now. You could be much more specific, of course, if you wished, but for me it makes logical sense to keep up to date with the most recent versions. Now we’ve got that sorted, I’ve got a basic HTML structure for our gallery, ready made with five images. If you go to the bottom of this post, you can download them, along with the completed code. div id="gallery"> <div class="galleryitem"><img src="image1.jpg" alt="A beautiful Sunset over a field" /><p>A beautiful Sunset over a field</p></div> <div class="galleryitem"><img src="image2.jpg" alt="Some penguins on the beach" /><p>Some penguins on the beach</p></div> <div class="galleryitem"><img src="image3.jpg" alt="The sun trying to break through the clouds" /><p>The sun trying to break through the clouds</p></div> <div class="galleryitem"><img src="image4.jpg" alt="Palm tress on a sunny day" /><p>Palm tress on a sunny day</p></div> <div class="galleryitem"><img src="image5.jpg" alt="The sun bursting through the tall grass" /><p>The sun bursting through the tall grass</p></div> </div> Next up we will apply some CSS styling to make it look nicer. Seeing as this is a jQuery tutorial, I’m not going to explain much of this. Essentially I’m just adding a border, styling the font and floating the images so they display next to each other. #gallery {width: 960px; margin: 0 auto;} .galleryitem {width: 300px; height: 300px;float: left; font-family: Lucida Sans Unicode, Arial; font-style: italic; font-size: 13px; border: 5px solid black; margin: 3px;} .galleryitem img {width: 300px;} .galleryitem p {text-indent: 15px;} And your page should look something like this: Looks pretty good! Our next step is going to be some jQuery. At last! We are going to remove the paragraphs and make them appear on hover, with some nice CSS styling to make them look really nice. What I’ve done is create a CSS id which we will apply to a paragraph when the corresponding image is hovered over: #galleryhoverp { margin-top: -55px; background-color: black; opacity: 0.5; -moz-opacity: 0.5; filter:alpha(opacity=50); height: 40px; color: white; padding-top: 10px;} So our first step is to hide all the paragraphs and then resize our gallery items so just the image is displayed. We’ll also save all our gallery items to a variable for later usage. $('p').hide(); var galleryItems = $('.galleryitem'); galleryItems.css('height', '200px'); And now lets add an effect for when the gallery item is hovered over. Firstly lets find all the images and save them. var images = $('.galleryitem').find('img'); The hover function is slightly unusual in that it takes two functions. The first is what should happen when the image is hovered over, the second when the mouse stops hovering over that image. galleryItems.hover( function() { //when hovered over }, function() { //when hovered ends } ) The code is very simple. We just select the next paragraph using the next() function, show it and then give it that id we created a while back. On the hover-out function, we just do the exact opposite: galleryItems.hover( function() { $(this).children("id").next('p').show().attr('id', 'galleryhoverp'); }, function() { $(this).children("id").next('p').hide().attr('id', ''); } ) And there you go! If you try it out now you should see the paragraphs show when you hover over, and then leave when you change to a different image. There is one more effect we will add. When you click on an image, it should enlarge, fill the centre of the screen and all the other images disappear. Again, I’m creating some CSS which we will add to the image we want to display: #singleimagedisplay {width: 800px;} #singleimagedisplay img {width: 800px;} #singleimagedisplay a {float: right; color: white;} We’ll add this code to the image’s parent – the div with a class of ‘galleryitem’. The code for the entire click event is below: images.click(function() { $(this).parent().attr('id', 'singleimagedisplay').css('height', $(this).height()).siblings().hide(); $(this).next('p').show().html($(this).next('p').html() + '<a href="jquery1.html">Back</a>'); }) So, when each image is clicked, these are the steps we take: And if you check out your page, you will find it works! There is one final issue. When viewing a single image, if you hover out, the paragraph goes away. We don’t want this, so we need to go back to our hover function and make a slight edit: galleryItems.hover( function() { if($(this).attr('id')!='singleimagedisplay') { $(this).children("img").next('p').show().attr('id', 'galleryhoverp'); } }, function() { if($(this).attr('id')!='singleimagedisplay') { $(this).children("img").next('p').hide().attr('id', ''); } } ); All we do is see if the id on the item is not set to ’singleimagedisplay’ which means that we are on the main gallery page, and then we can run the code we had originally. And we are done. You can download everything below: Download the page and images. I hope you found this a useful lesson, and I will see you next time.  |


| You are subscribed to email updates from 1stwebdesigner - Graphic and Web Design Blog To stop receiving these emails, you may unsubscribe now. | Email delivery powered by Google |
| Google Inc., 20 West Kinzie, Chicago IL USA 60610 | |
Comments (0)
Post a Comment